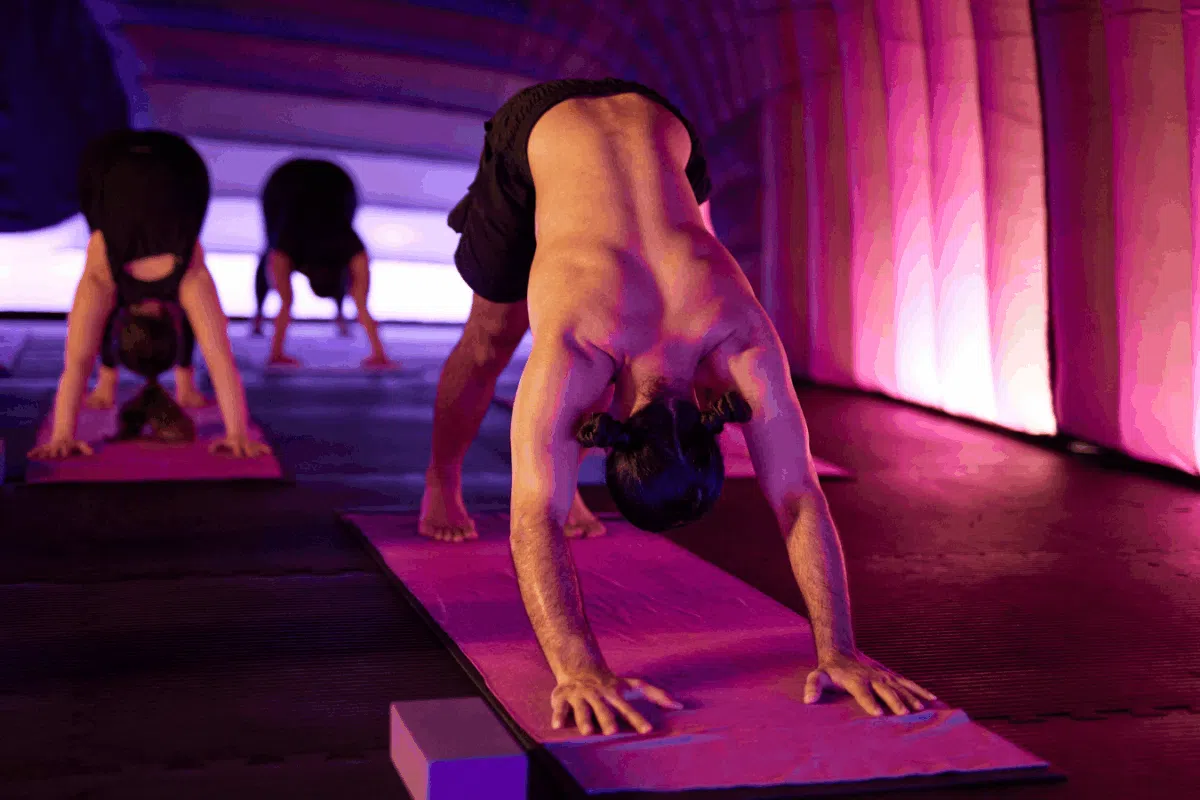
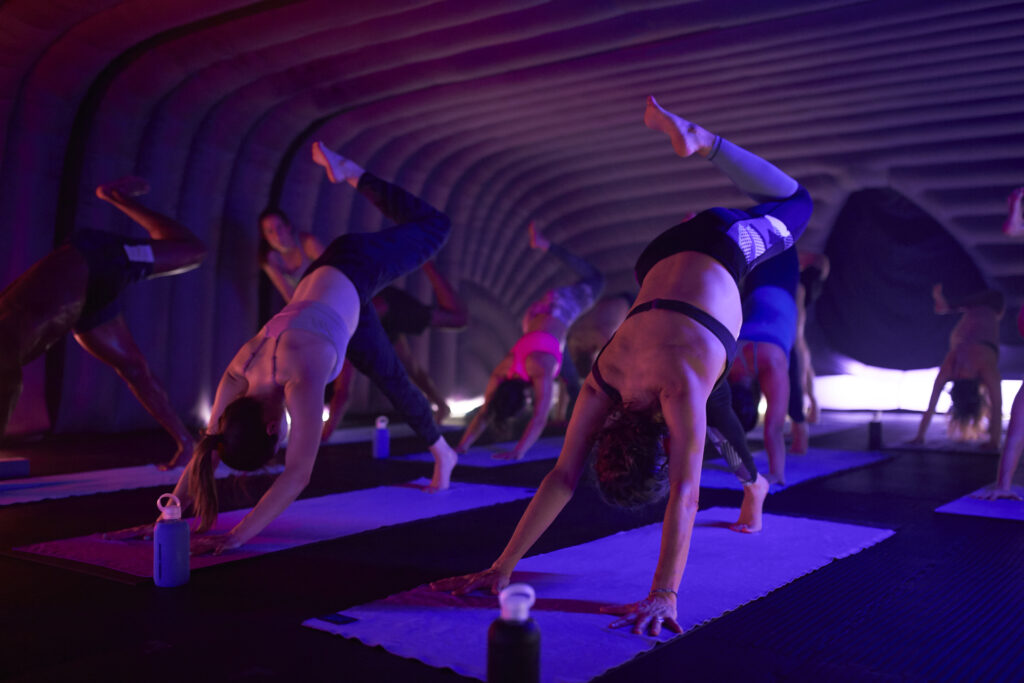
If you’ve been to a class at Hotpod Yoga, or pretty much any yoga class, chances are you’ve found yourself in a downward facing dog or two. Hips up, hands and feet down, body shaped like an upside-down ‘V’, sound familiar? Downward dog is the bread-and-butter of yoga poses. It shows up a lot as a place to pause, reset and catch your breath before flowing into the next shape.
But don’t be fooled, just because it’s a yoga position that pops up often doesn’t mean it’s not hard work (if you know you know). Downward dog, while offering us a moment of rest, is not necessarily a restful pose: it’s active, energising, and sneaky in the way it works the whole body. Whether you’re a beginner or have been practicing for years, here are some tips to help get you comfortable (and confident) in your down dog.
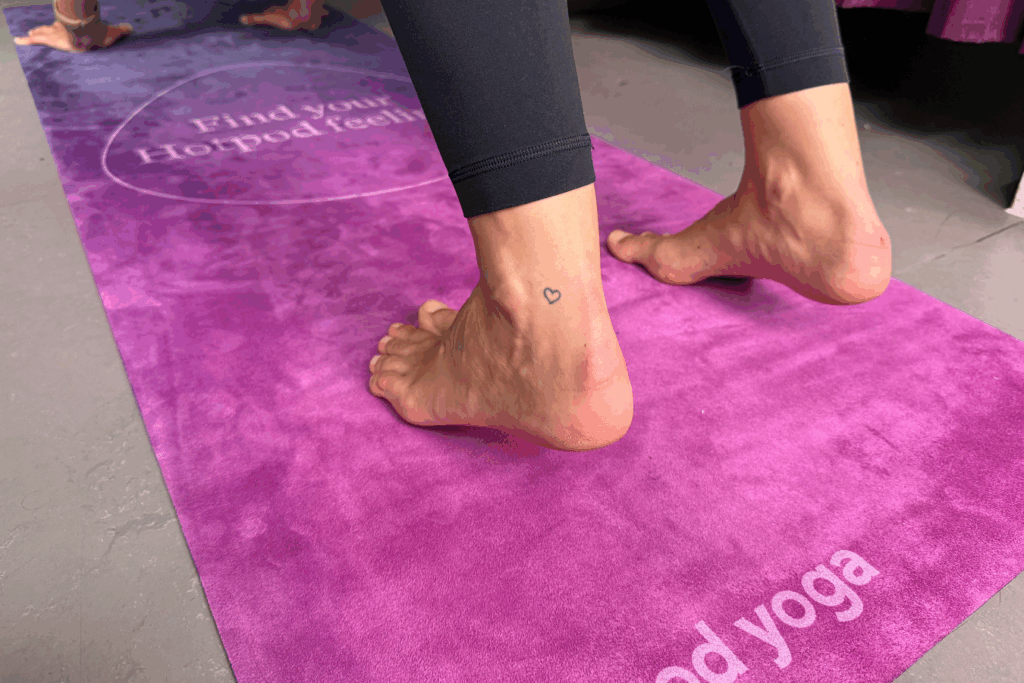
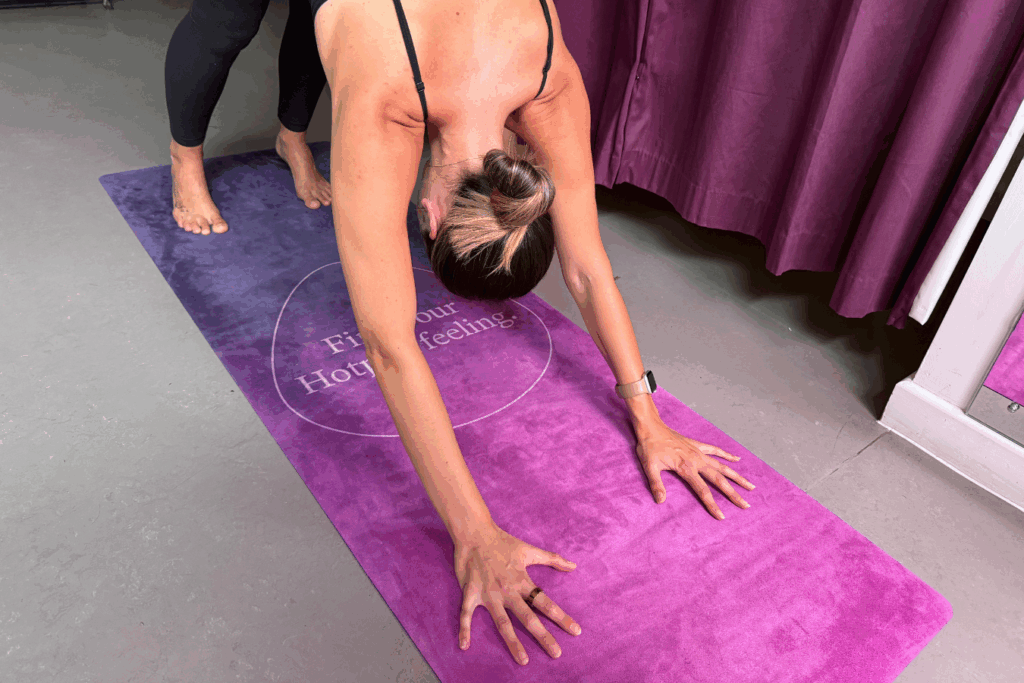
Find your feet
Your feet are about hip width apart and parallel to each other. Depending on how tight your legs are, your heels might touch the mat or they might not. Either way is fine. What’s important is that you’re reaching the heels down, even if they don’t land. That stretch will help open up your calves and Achilles, and over time, your heels may naturally sink a little lower.
If the stretch feels too intense (hello, hamstrings), try taking your feet slightly wider. This will shift the stretch to the, often less tense, medial hamstrings and make the pose feel more manageable. As your body warms up or your flexibility improves, you can always bring your feet closer.
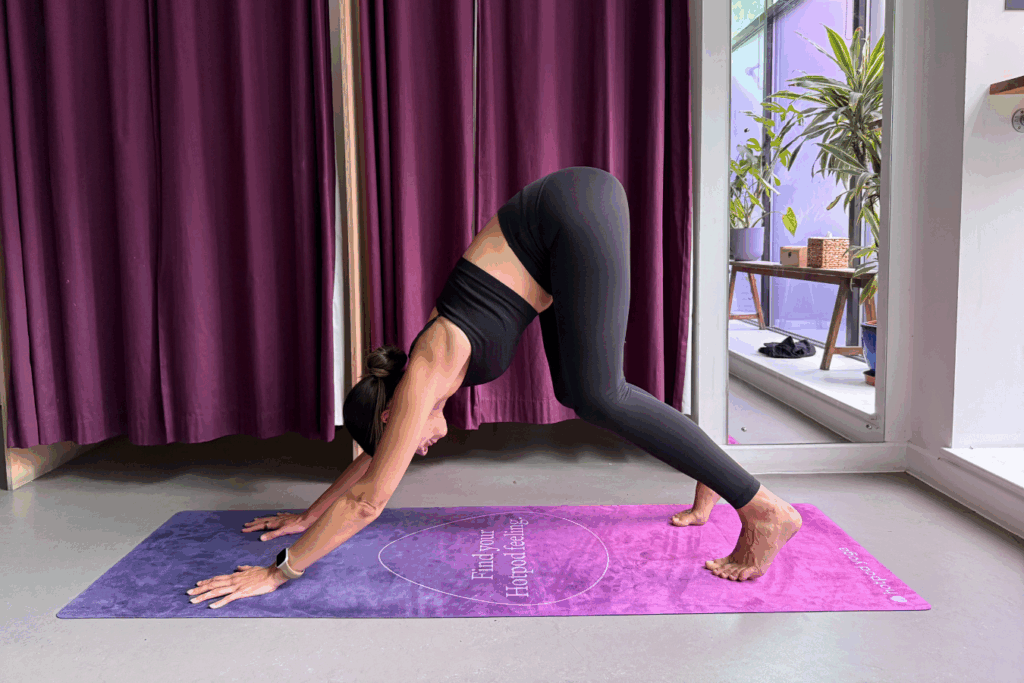
To bend or not to bend?
Short answer: bend them. Especially at first. There’s a common myth that your legs have to be straight in downward dog, but for many of us, bending the knees actually makes the pose more effective. It takes pressure off the hamstring stretch and lets you lift your hips higher, creating more length in the spine, which is one of the main aims in down dog.
When you first enter your downward dog, try this: bend your knees and pull the hip bones up and away from the armpits. Feel how that lengthens the spine? From there, if you can start to straighten the legs without losing the space you’ve created in the torso, go for it. But if not, keep the bend. It’s all about what works for your body and we’re all different.
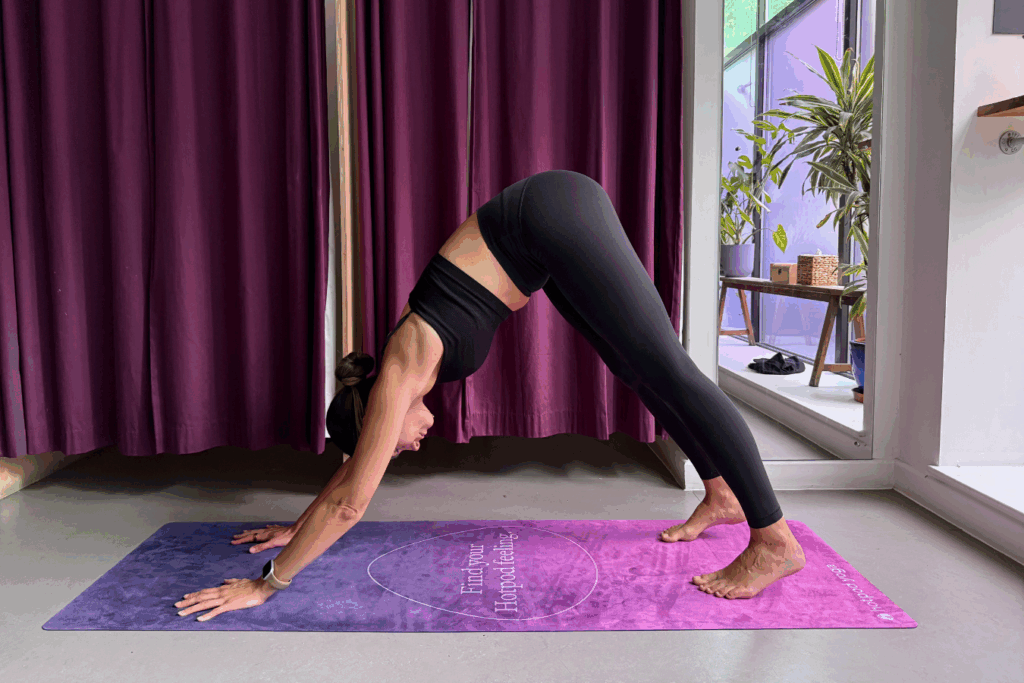
Pelvis: think tilt, not tuck.
One of the key players in a downward dog is the pelvis. A lot of people automatically tuck their tailbone under in this pose, especially if the backs of the legs are feeling tight. Instead, we want to try and lift the sitting bones up toward the ceiling, like you’re pointing your tailbone to the sky. This subtle shift helps lengthen the spine and create space in the lower back.
To find the sweet spot, bend the knees slightly and see if you can tilt your pelvis forward while keeping your core strong so your ribs don’t flare out. You want the movement to come from the hips, not the lower back or ribs. With the pelvis in a good spot, voilà, the pose will start to feel more spacious.
What about the shoulders?
In a down dog it’s easy to grip in the shoulders, especially if you’re holding the pose for a while and other parts of the body are working hard. But really, your shoulders want space not strain.
Try gently turning your upper arms, so your inner arms (where your biceps are) face slightly forward and the outer arms (where your triceps are) roll back. It’s super subtle, but it will help broaden across the collarbones and create more stability through the shoulder joints.
One simple cue: press firmly through the palms and imagine pushing the mat away from you, like you’re trying to slide it forward. This will engage the arms and shoulders without collapsing into them. If you’re feeling bunched up in the shoulders and like your weight is dumping forward into your hands, try bending the knees a bit. That’ll help shift some weight back into your legs and create more space up top.
And finally, soften the elbows slightly if they tend to hyperextend and check in with your face and jaw. If you’re clenching there, you’re probably gripping your shoulders too. A little awareness can go a long way.
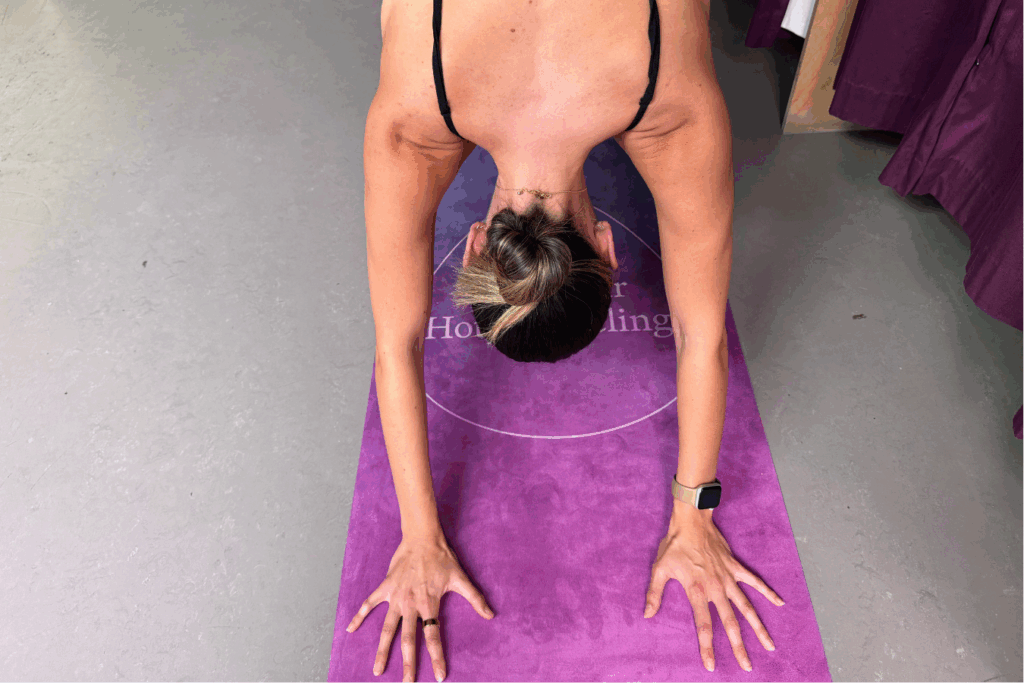
Get a grip (literally)
It’s easy to forget about the hands, but they’re two of only four points touching the mat, so they’re doing a lot of work in down dog.
Let’s start with their placement: hands roughly shoulder width apart as a rule of thumb. But if the shoulders feel tight, try taking the hands a bit wider and turning the fingertips slightly out. This can help create more space across the chest. As your shoulders open up over time, you can gradually bring the hands closer in. The distance between your hands and feet should be about the same length as a high plank. If your stance is too short, you won’t have the space to lengthen. If it’s too long, the pose can start to feel like an upper-body workout.
Fingers are spread to broaden your base. To help support your wrists, try lightly gripping the mat with your fingertips, almost like you’re suction cupping your hands off the floor. This spreads weight more evenly through the hands, so it’s not all dumping into the heel of the palm.
If you notice the wrists getting tired or tense, try shifting more weight back into the legs. A gentle bend in the knees and a pull of the hips up and back can make a big difference. And if your hands need a break, give them a little shake out, then replant them with intention.
Down dog and beyond
Downward dog is definitely more than meets the eye. It’s a full-body shape that takes some getting used to, especially if you’re exploring yoga for beginners. The key? Don’t stress about making it perfect. Play around, listen to your body and let the pose evolve over time.
We’ve got plenty more yoga tips coming your way, so keep checking back as we dig into more yoga shapes, tricks and all the good stuff to help you along the way.
Want to experience the pod? Find your local studio here.